ISO 23475-1:2021
(Main)Testing method for steel tyre cord — Part 1: General requirements
Testing method for steel tyre cord — Part 1: General requirements
This document specifies test methods of steel cords which are used for tyre reinforcement. Dimension, process properties, mechanical properties and coating test method are all included.
Méthode d'essai pour les câbles de pneumatiques en acier — Partie 1: Exigences générales
General Information
Standards Content (Sample)
INTERNATIONAL ISO
STANDARD 23475-1
First edition
2021-02
Testing method for steel tyre cord —
Part 1:
General requirements
Méthode d'essai pour les câbles de pneumatiques en acier —
Partie 1: Exigences générales
Reference number
©
ISO 2021
© ISO 2021
All rights reserved. Unless otherwise specified, or required in the context of its implementation, no part of this publication may
be reproduced or utilized otherwise in any form or by any means, electronic or mechanical, including photocopying, or posting
on the internet or an intranet, without prior written permission. Permission can be requested from either ISO at the address
below or ISO’s member body in the country of the requester.
ISO copyright office
CP 401 • Ch. de Blandonnet 8
CH-1214 Vernier, Geneva
Phone: +41 22 749 01 11
Email: copyright@iso.org
Website: www.iso.org
Published in Switzerland
ii © ISO 2021 – All rights reserved
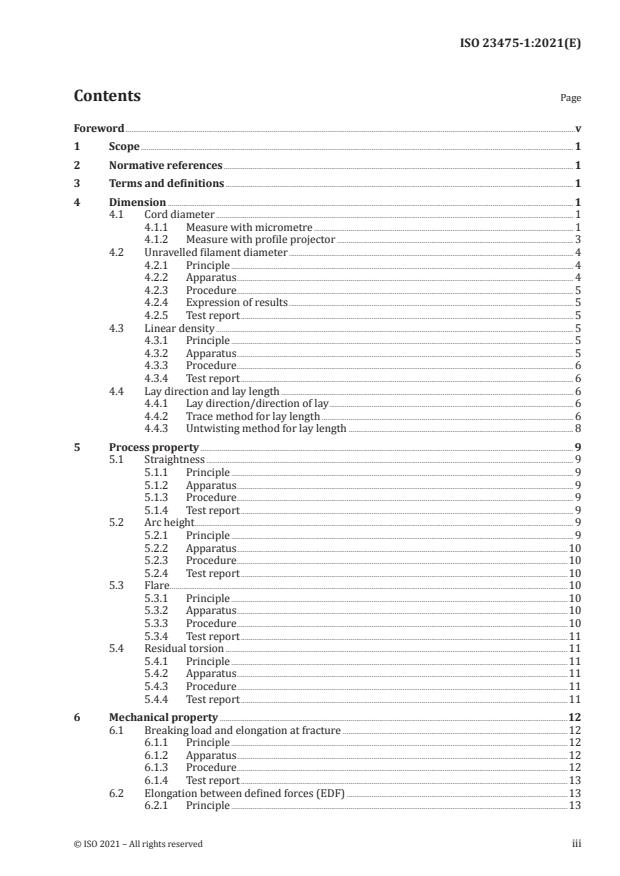
Contents Page
Foreword .v
1 Scope . 1
2 Normative references . 1
3 Terms and definitions . 1
4 Dimension . 1
4.1 Cord diameter . 1
4.1.1 Measure with micrometre . 1
4.1.2 Measure with profile projector . 3
4.2 Unravelled filament diameter . 4
4.2.1 Principle . 4
4.2.2 Apparatus . 4
4.2.3 Procedure . 5
4.2.4 Expression of results . 5
4.2.5 Test report . 5
4.3 Linear density . 5
4.3.1 Principle . 5
4.3.2 Apparatus . 5
4.3.3 Procedure . 6
4.3.4 Test report . 6
4.4 Lay direction and lay length . 6
4.4.1 Lay direction/direction of lay . 6
4.4.2 Trace method for lay length . 6
4.4.3 Untwisting method for lay length . 8
5 Process property . 9
5.1 Straightness . 9
5.1.1 Principle . 9
5.1.2 Apparatus . 9
5.1.3 Procedure . 9
5.1.4 Test report . 9
5.2 Arc height . 9
5.2.1 Principle . 9
5.2.2 Apparatus .10
5.2.3 Procedure .10
5.2.4 Test report .10
5.3 Flare .10
5.3.1 Principle .10
5.3.2 Apparatus .10
5.3.3 Procedure .10
5.3.4 Test report .11
5.4 Residual torsion .11
5.4.1 Principle .11
5.4.2 Apparatus .11
5.4.3 Procedure .11
5.4.4 Test report .11
6 Mechanical property .12
6.1 Breaking load and elongation at fracture .12
6.1.1 Principle .12
6.1.2 Apparatus .12
6.1.3 Procedure .12
6.1.4 Test report .13
6.2 Elongation between defined forces (EDF) .13
6.2.1 Principle .13
6.2.2 Apparatus .14
6.2.3 Procedure .15
6.2.4 Test report .15
6.3 Loop test (Elasticity) .15
6.3.1 Principle .15
6.3.2 Apparatus .15
6.3.3 Procedure .16
6.3.4 Test report .17
7 Determination of mass and composition of coating by X-Ray fluorescence spectroscopy .17
7.1 Principle .17
7.2 Apparatus .17
7.2.1 WDXRFS or EDXRFS .17
7.2.2 Analytical balance, which can be read to the nearest 0,001 g. .17
7.2.3 Dispenser, with the accuracy of 25,00 ml ± 0,05 ml. .17
7.2.4 X/Y shaker, with variable frequency. .17
7.3 Reagents.17
7.3.1 Acetone or diethyl ether .17
7.3.2 Ammonium persulphate (mass fraction >98 %) .17
7.3.3 Ammonia (mass fraction >25 %, not more than “d=0,91” at temperature 20 °C) 17
7.3.4 Stripping solution, for 1 l: weigh 16 g ammonia persulphate into a
beaker of 600 ml and dissolve in 400 ml demineralized water. Transfer
quantitatively into a 1 l volumetric flask. Add 120 ml ammonia. Fill up to
the mark with demineralized water. Shake well. .17
7.3.5 Standard, the matrix and range should cover the sample rang
...


Questions, Comments and Discussion
Ask us and Technical Secretary will try to provide an answer. You can facilitate discussion about the standard in here.